The Nikon D750 is a full frame dSLR with a. 24MP sensor.
‘SLR’ is an abbreviation for single lens reflex. Light enters the camera through the lens. It is reflected by mirrors and a prism up and into the viewfinder. When the photographer presses the shutter, the mirror has to get out of the way. In its rest position the mirror is in the path of the light that needs to reach the sensor. So the mirror housing springs up and then down again. That’s the ‘reflex’ in single lens reflex.
Mirror-less cameras don’t have a prism and mirror arrangement. In the viewfinder the photographer sees a digital representation of the scene,
But I hankered to use a dSLR because it has an optical viewfinder. And I wanted to compare a full frame sensor to the crop sensor of the D5600.
Why the D750 in particular?
I like highly detailed images. The ‘image quality’ page on DP Review consistently shows the D750 is capable of highly detailed images. And the images don’t fall apart at high ISO.
The same is true of the Canon EOS R6 mirror-less camera that I am very pleased with also.
SLRs are a dying breed. Nikon is not making any of them any more. It’s a pity because now that I have tested the D750 I can say from my own experience that it is a very good camera. The image quality if great.
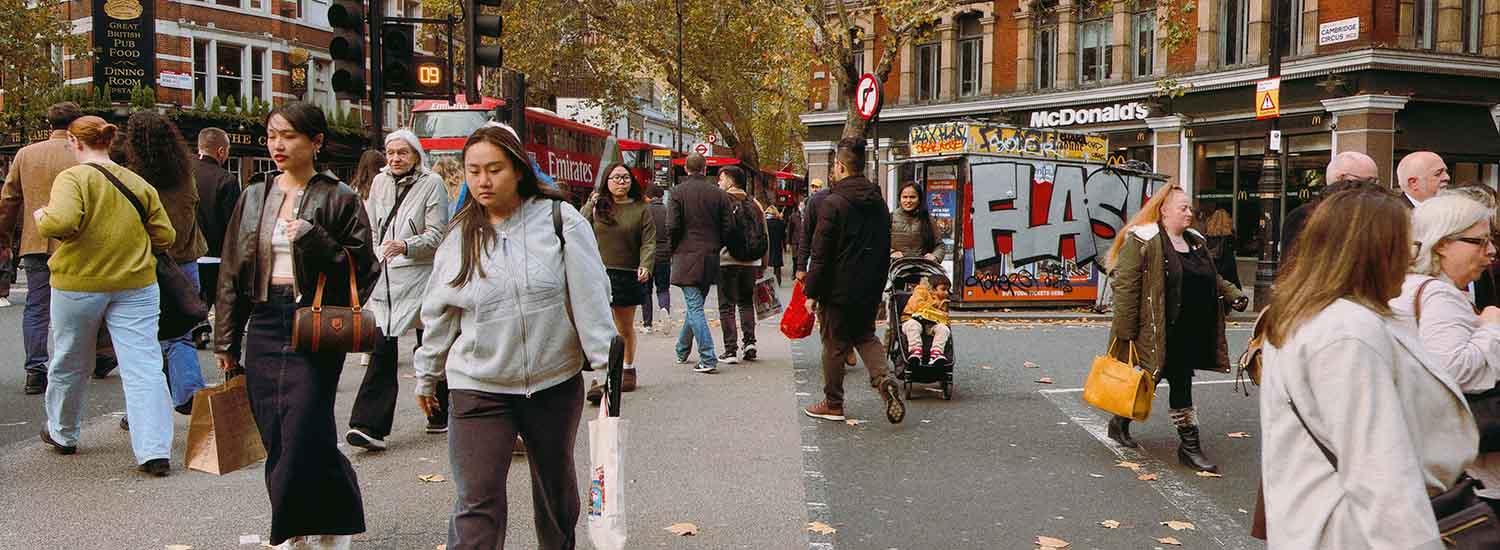
I shot this from across the street, outside the camera shop when I was trying out the camera. Shot at f/4.5 and 1/320th second and ISO 800.
I put ‘correctly’ in quotes because everyone has their taste. So what does ‘correctly’ mean here?
What it means here is the way to get the maximum information out of the scene. Put simply, if the shot is underexposed then some of the dark areas may not show detail. Or if overexposed then the highlights might be blown and not show detail.
The Zone System is a method of getting an optimal exposure of black and white photographs. It was created by Ansel Adams. a landscape photographer, and Fred Archer, a portrait photographer.
The method divides the tonal range of a scene into eleven zones from pure black to pure white. Notice that the range starts with Zone zero.
Zone 0: Pure black (no detail) Zone 1: Near black (minimal detail) Zone 2: Very dark shadow Zone 3: Dark shadow with visible texture Zone 4: Slightly darker shadow with good detail Zone 5: Middle gray (18% gray), average light meter reading Zone 6: Light gray (skin tone, sunlit grass) Zone 7: Bright highlights (texture still visible) Zone 8: Very bright highlights (minimal detail) Zone 9: Near white (no detail) Zone 10: Pure white (no detail)
To use it you measure light in your chosen part of the scene with your light meter. That may be a hand-held meter or the meter built into your camera. Whichever it is, all light meters are built to ‘assume’ that all scenes are Zone 5, middle grey. That is of course not true. A black cat in the snow for example.
And before we go any further you should know that while it is true the meters in cameras are based on middle grey, modern cameras are also computers. They look at the scene and measure it against a bank of similar scenes in their built-in database. If a camera stores 90,000 scenes then the chances are it has a black cat in the snow in there. So even assuming the light meter works on 18% grey Zone 5 and is wrong, it will correct itself if it recognises the scene.
And even if a camera does not have a built-in database of scenes, it will have metering that can cover most of the scene and then average out the brightness.
At the other end of evaluative metering, cameras now have AI or machine learning so they learn more scenes the more photographs the photographer takes.
In 2024 with built-in scene recognition and intelligent exposure adjustments we are a long way from Kansas.
So for the rest of this article I am talking about the zone system used with a hand-held light meter,
The Method
Put your camera on manual exposure. Point the light meter at the part of the scene you want to measure. The part you want to measure is the part in the scene that is important to you. Everything else in the scene will be measured by reference to that.
The meter will always give you an exposure (shutter speed and aperture) for Zone 5. Decide what Zone your chosen area should actually be in. Yes, that means you have to put your brain’s evaluative input into the calculation. Adjust the exposure. If you think the part of the scene you measured is Zone 3, then reduce exposure by two stops. In other words you are saying the following.
My starting point was to meter the brightness of the part of the scene I think is important. Now I want to expose darker than the meter is telling me because in my opinion the bit of the scene I want to measure is not mid grey, It is two stops darker than mid grey. So I reduce exposure by two stops.
That’s it. That’s the Zone system.
Meanwhile, with digital photography it is just a ‘flick of switch’ as it were to make a black and white version of a full colour image. Click on the image to see a large version.
By the way this is a crop of about one seventh of the full frame of a photo I took of this couple, from across the street with a 50mm lens on a Nikon D750.
Several digital cameras can shoot panoramic still photos natively by automatically stitching images together in-camera. Here’s a list of cameras that include a built-in panoramic mode:
Sony
Sony Alpha Series (A7, A9, A6000, A6400, A6600, A6700) – “Sweep Panorama” mode, allowing users to sweep across a scene to capture a panoramic image. As the camera shoots the images it also simultaneously stitches them together to create a single panoramic view.
Sony RX100 Series – The RX100 series, especially models like the RX100 VI and VII, feature the “Sweep Panorama” mode for creating panoramic shots.
Fujifilm
Fujifilm X-T Series (X-T30, X-T4, X-T5) and the Fujifilm X100V and Fujifilm X100VI support panoramic shooting with seamless stitching within the camera
Now I have the Fujifilm X-T50 I have more incentive to want to know whether it too has a built-in sweep panorama mode, and it does. The panorama mode is accessed via the camera’s drive menu. Press the shared Delete/Drive button on the rear of the camera and select the Adv > PANORAMA option from the on-screen menu. Then to shoot, press the shutter button all the way down once, and then sweep the camera in the direction indicated by an on-screen arrow.
Canon
Canon PowerShot Series – Some compact cameras like the PowerShot G7 X Mark III or G5 X Mark II have a built-in panoramic mode.
Canon EOS M Series – Some EOS M-series mirrorless cameras also offer a panoramic sweep function, depending on the model.
Canon EOS R Series – Some EOS R-series mirrorless cameras also offer a panoramic sweep function, depending on the model – such the R50, R6, R6II, R6III, and the R5 models.
Nikon
Nikon Z Series (Z6, Z7, Z9, Z5II, Z6II, Z7II, Z8, and Z9) cameras have an in-camera panorama mode, though it varies slightly depending on the model and firmware.
Nikon Coolpix Series – The Coolpix cameras, like the P1000, offer dedicated panoramic modes.
Panasonic
Panasonic Lumix G Series (G85, G95, G9) have a panorama mode for capturing wide-angle shots natively.
Olympus
Olympus OM-D Series (E-M10, E-M5) – Olympus offers a panoramic function built into many of their OM-D mirrorless cameras.
2. Shooting With A Wide Aspect Ratio Without Stitching
Then there are digital cameras that can shoot 16:9, either natively supporting wide aspect ratios (like 16:9) or have crop modes in wide format:
1. Sony
Sony Alpha Series (A7 III, A7R IV, A7S III, A1) Sony RX100 Series Sony RX10 IV
2. Fujifilm
Fujifilm GFX Series (GFX 50S, GFX 100S), Fujifilm X-T Series, including the X-T50, which I have. They do it by cropping from the native 3:2 frame, so the actual number of pixels being recorded is reduced. And bearing in mind that you can crop to 16:9 in post processing, the question is why one would bother with a wide mode. For me the answer is that seeing the framing in the camera is a whole different thing to trying to visualise it and how it will work in post processing.
An aspect ratio of 16:9 is getting there but it is not that extreme, and I would really like a camera that can shoot at a wider aspect ratio.
Ideally, I would like to see an even more extreme aspect ratio like the Widelux film camera that is no longer made. It has a rotating section with a vertical slit that scans across the film and produced wide images on 35mm film that are about two-and-a-third times as long as they are tall.
Then there’s the XPan film camera – a joint venture by Hasselblad and Fujifilm. The aspect ratio was even wider, producing images on 35mm film that are nearly two-and-three-quarters times as long as they are tall.
Then, if you are satisfied with the quality of shots from a phone, the MOOD app that I have on my iPhone 16 shoots at an aspect ratio 3:1
3. Panasonic
Panasonic Lumix G Series (G9, GH5, GH6) Panasonic Lumix LX100 II
4. Canon
Canon EOS R Series (R5, R6 II, R7, R8) Canon PowerShot G7 X Mark III
5. Nikon
Nikon Z Series (Z6 II, Z7 II, Z9) Nikon Coolpix P1000
Sony A6000 344g 2014 Sony A6500 453g 2016 has in-body image stabilisation Sony A6300 403g 2016 Sony A6400 404g 2019 has real-time tracking and a touchscreen Sony A6100 396g 2019 has teal-time tracking and a touchscreen Sony A6600 503g 2019 has real-time tracking, a touchscreen, and in-body image stabilisation Sony A6700 409g 2023 has real-time tracking, a touchscreen, and in-body image stabilisation
The A6000 and the A6100 have a lower spec body construction and EVFs than the others.
The A6000 and A6100 have 1.44 million dot – 800 x 600 pixels EVFs
The A6300, A6400, A6500, A6600 and, A6700 have 2.36m dot — 1024 x 768 pixels EVFs
As a comparison, the Canon R50 has 2.36m dots and you can see the difference even against the EVF with the same pixel density in the A6400. The Canon looks bigger and brighter.
The Canon R6 has a 3.69m dots — 1280 x 960 pixels EVF and is physically bigger – half and inch rather than a third of an inch.